
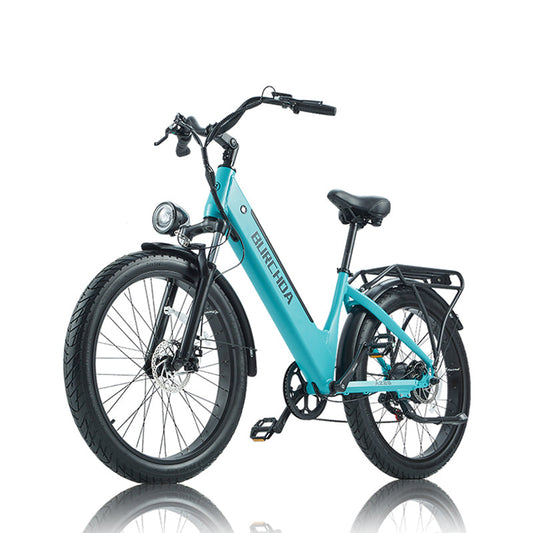
BURCHDA R5 PRO User Manual
R5 PRO ELECTRIC BICYCLE
OPERATION AND MAINTENANCE
USER MANUAL
- Please carefully check whether all parts are in good condition before. If there is any problem, please contact the dealer in time.
- Abide by the city traffic laws and regulations when using.
- Slow down when encountering rain, snow and passing through slippery roads, increase braking distance when braking, and avoid traveling as much as possible to ensure safety.
- Do not disassemble parts without authorization. If you need to replace them, please purchase standard parts from distributors.
- Wading is prohibited during riding or when riding in rainy days. When accumulated water floods the lowest position of motor hub, it will cause line failure.
- Do not contact the metal point of the battery, otherwise it will produce a large short-circuit current and cause an accident and fire, please pay attention!
- Wear a helmet when riding an electric bicycle, and carry articles according to the law.
- Do not park electric bicycles in the foyer, stairs, walkways and safety exits of buildings.
- Due to the continuous improvement of products in technology, there may be different things between the physical objects and the instructions. Please take the physical objects as the standard.
Special Tips:
Do not park electric bicycles in the foyer, stairs, walkways and safety exits of buildings.
Electric bicycles should not be charged and parked in residential buildings. When charging, they should stay away from combustibles and flammable materials and avoid charging for a long time.
Waste batteries cannot be disassembled without authorization.

Riding Precautions
· Accelerate slowly when starting, and help with pedals when climbing, which can prolong the service life of batteries and motors.
· The bicycle controller is equipped with overload protection function, which will automatically cut off the power supply when overload occurs, and when it returns to normal, the power supply of the electric bicycle will be automatically turned on.
· The maximum load capacity of this bicycle is 180kg (including the weight of riders). Do not overload driving. When driving on complex roads, try to ride and turn on the shock absorption function.
Parking Precautions
· When implementing, the power switch should be turned off to prevent accidents caused by sudden start of the bicycle due to unintentional rotation of the speed regulating handle. When parking, turn off the power supply, lock the battery and remove the key.
· For the sake of your driving safety and keeping your bike in the best condition, please maintain it regularly.
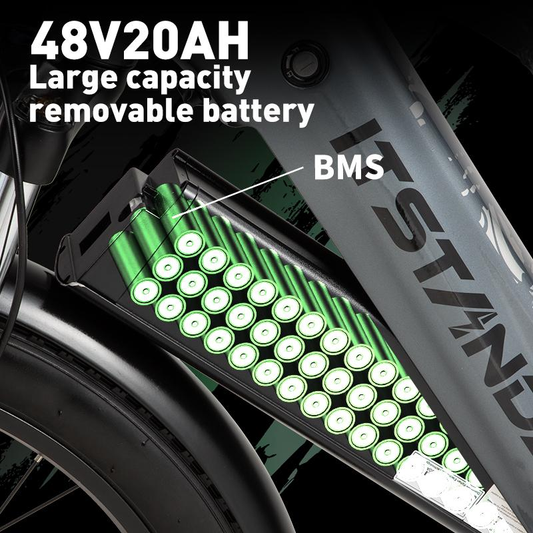
Battery Storage
· Please store the battery at the ambient temperature of 20 ~ 25℃, and do not store the battery in an environment higher than 50℃, otherwise it will lead to irreversible capacity attenuation of the battery.
· If the bicycle is not used for a long time (such as winter, summer or other special
circumstances), the battery must be taken out and stored separately, maintained and charged regularly, otherwise the battery may run out and cause irreversible damage.
· The most suitable storage capacity of the battery is 50%, and long-term storage of less than 10% or more than 90% will lead to irreversible capacity attenuation of the battery.
Product configuration table

|
Frame |
Aluminum alloy |
Brake |
Hydraulic brake |
|
Battery weight |
4.4KG |
Central axis |
Sealed central shaft |
|
Variable speed |
shimano 8 speed |
Load |
About 180Kg |
|
Instrument |
Intelligent instrument |
Hub |
One-piece wheel/spoke wheel |
|
Controller |
Vector controller |
Charging time |
6-7hours |
|
Tire size |
26 inches |
Climbing ability |
Approximately 30 ° |
|
Body weight |
38KG |
|
|
* Please note that due to the upgrade of the product, the bicycle you own may be different from the picture and configuration.
* Product configuration is subject to physical objects.
Bicycle Installation
Since 95% of the bicycles have been installed, the rest can be installed directly after receiving.

1. As shown in the figure, the front wheels of the bicycle you receive are separated from the bicycle body.

2. Adjust the position of the riser.

3. Install handlebar riser

4. Stick the front fork on the quick release
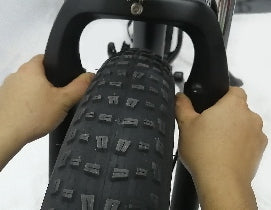
5. Adjust the center position of the tire so that the positions on both sides are the same.
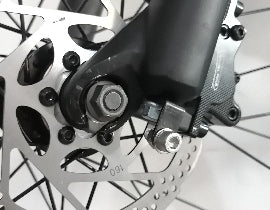
6. Tighten the left and right nuts as shown

7. Install the fenders and tighten the screws
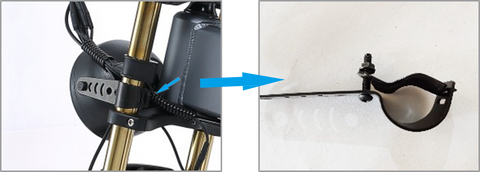
8. install lights
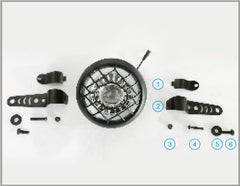
9. Insert the No. 1 fixing piece into the slot of the No. 2 fixing piece as the right picture shows

11. Install the No. 5 washer and No. 6 screw as shown in the figure

12. Link the light line, pay attention to the arrow corresponding to the direction of the arrow at the other end

13. Install the left and right pedals separately
Bicycle Installation Renderings

3. Fork Description
Turn the switch on the left side to switch the front fork damping system, and adjust the damping softness and hardness on the right side.

Handlebar control unit description

Description Of Variable Speed Finger Dial
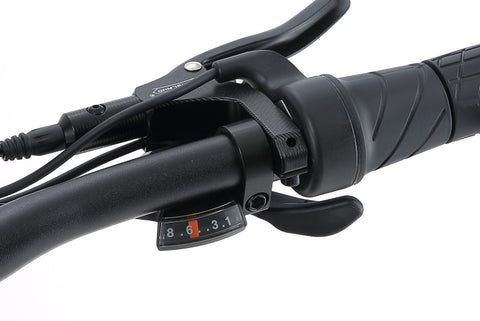
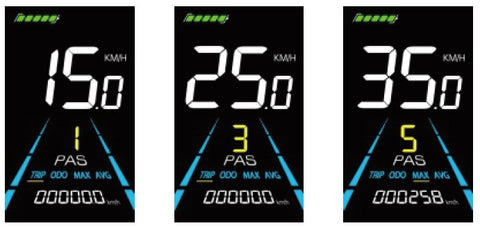
Eight-level speed change finger dial
· Please use the speed-changing finger dial when pedaling. (Note: Do not use it when it is still)
· When changing speed, it needs to be adjusted step by step (note: do not directly adjust from level 1 to level 8)
Instrument Description
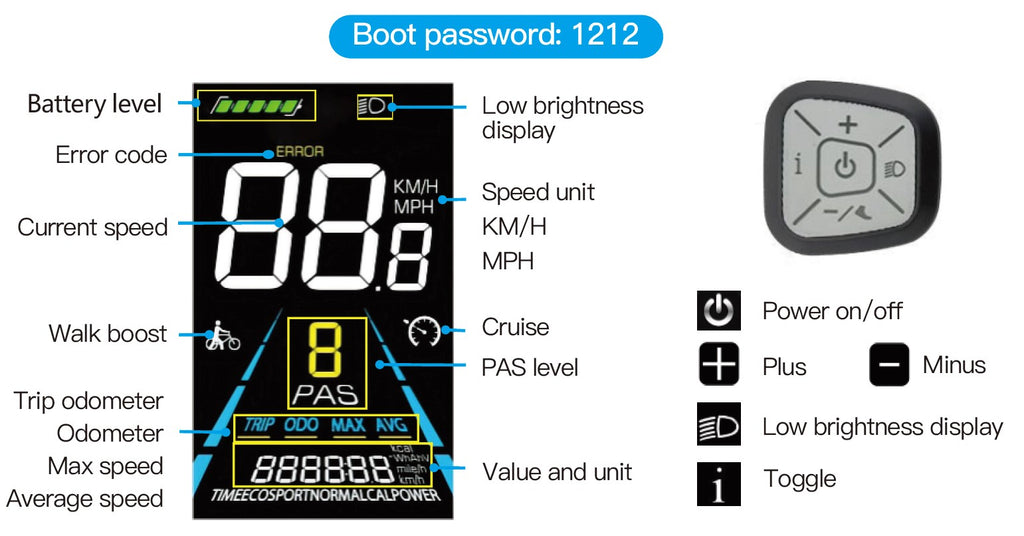
Power on/off
Long press  to power on/off the display. When the display is off, it will not use the battery power and the leakage current is less than 1uA.
NOTICE:The display will automatically shut off if it is not used for more than 10 minutes.
Display interface switching
When the display is powered on, it will show the Current Speed (km/h) and Trip Odometer (km) by default. Short press  to switch between Trip Odometer(km), Odometer (km), Maximum Speed (km/h), and Average Speed (km/h)
Walk boost mode
Long Press and hold  , the electric bicycle enters the walk boost mode. The electric bicycle will walk at a fixed speed of 6 km per hour and the display shows
  . Release to stop the power output immediately and restore to the state
before walk boost.
NOTICE:The walk boost mode can only be used when pushing
the electric bicycle, please do not use it while riding.

PAS level selection
Press  /
/  to switch PAS level of electric bicycle, thus changing the motor
output power
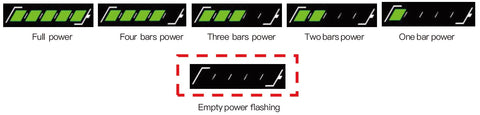
Battery level display
The Battery level is shown as 5 bars. When the battery is full charged, all of the 5 bars lighten up. When the battery is fully depleted, the bar will begin to flash, warning the user to charge the battery as soon as possible
Error code display
If there is a fault occurs in the electronic system of the electric bicycle, the display will automatically show an error code, see Schedule 1 for a detailed definition of the error code.
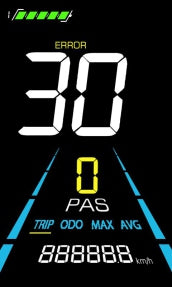
NOTICE: When the error code appears on the display, please troubleshoot the problem in time, the electric bicycle will not be able to drive normally after the problem occurs.
Correct Use Of Charger
· Electric bicycles are equipped with special batteries, which must be charged by the special charger provided by our company. Before charging, the electric bicycle must turn off the power supply. When charging, the output end of the charger is linked to the electric bicycle, and then the other end of the charger is linked to the power supply for charging. The red ndicator of the charger lights up, indicating that charging is underway.
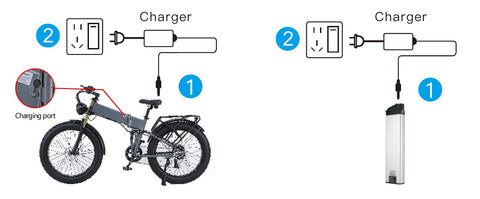
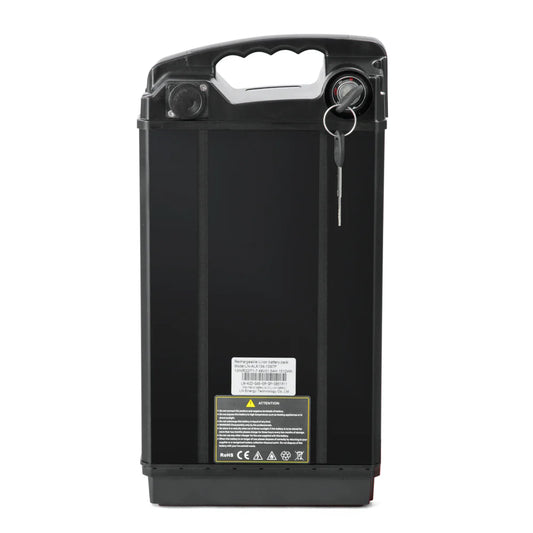
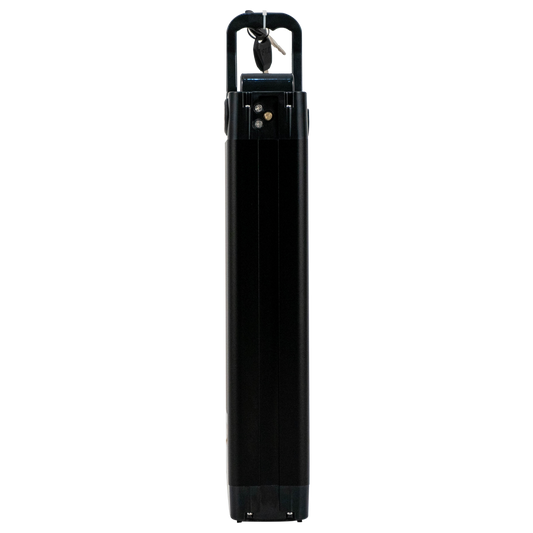
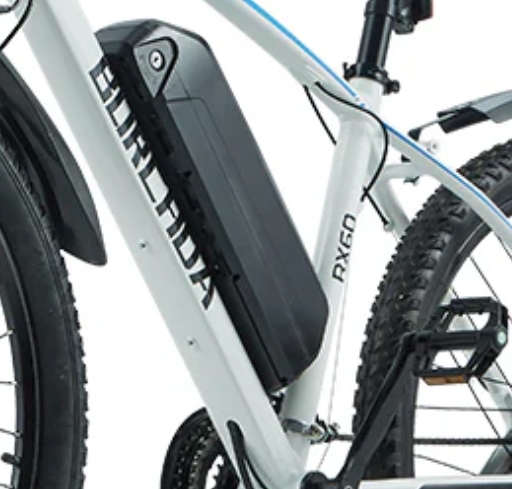
Battery Disassembly And Assembly
Battery disassembly and assembly: The electric bicycle has built-in hidden battery and hidden lock. When taking out the battery, fold the electric bicycle and open the lock with the key to take it out.
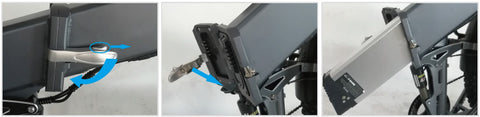
1. Open the safety buckle first, and then open the folding buckle.
2. Insert the key and turn clockwise to lock the battery. Turn counterclockwise to remove the battery.
3. Take out the key and take out the battery.
Precautions For Battery Use
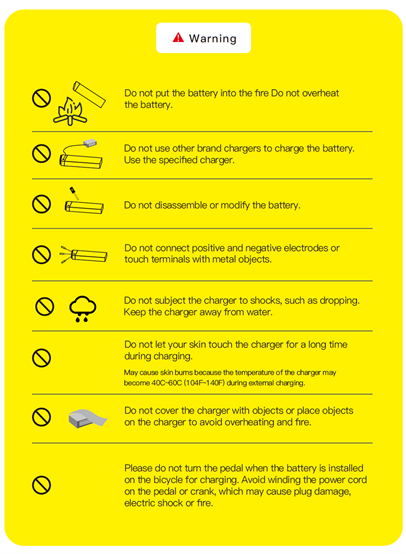
· It takes about 6 hours to charge the battery. When the indicator turns green, it indicates that it is fully charged. Turn off the power connected to the charger first, remove the charger, and try to avoid charging for a long time (avoid more than 12 hours)
· When charging, the charger and battery should not be covered with anything to avoid danger caused by overheating. It is recommended to start charging when the battery charge is less than 20%. When parking for a long time, it should be stored at 50% of the power, and must be charged once every other month.
· If you smell peculiar smell during charging, please stop charging immediately and send it to the maintenance office for maintenance.
· When charging, do not touch the battery or charger, and children are strictly forbidden to touch the charger.
· Keep the charger or battery away from flammable materials. Do not charge near babies and children. Do not charge in an unattended state for a long time. For the safety of you and your family, it is recommended not to charge in the early morning.
· Please do not use other brands of charger charging, charger is high-voltage circuit, do not disassemble without authorization.
Energy Consumption Description
* The battery should be fully charged before long-distance travel. Rugged road conditions and hilly terrain will consume more energy.
* Carrying more weight on an electric bicycle will consume more energy.
* When an electric bicycle runs at low temperature, its cruising range will be reduced.
* When the battery is turned off, your electric bike will be used as an ordinary bike.
Pattern Description
 |
The key is opened, the instrument is opened, and the switch is twisted. The electric bicycle is driven by electricity. |
 |
The key is turned on, and the instrument is turned on. At this time, the electric auxiliary mode will be started, which is driven by manpower and electric power. |
 |
Riding an electric bicycle, the electric bicycle is driven by manpower. |
· In pedal assist mode, assist is triggered when the pedal is pressed forward, and is stopped when the pedal is stopped. When you brake, the power assist system will automatically stop, allowing the e-bike to slow down and stop. When the e-bike reaches the maximum speed of the gear you have selected, the power assist will turn itself off. The key is opened, the instrument is opened, and the switch is twisted. The electric bicycle is driven by electricity.
Motor Description
When the electric bicycle starts, the input current of the drive motor is large, and the motor will have a certain noise to overcome the resistance to reach the speed. It is the friction sound of the current torque and the magnetic force, which is a normal phenomenon. If the starting current of the electric bicycle is increased, all noises will be more obvious. This is a normal phenomenon and will not affect the use of the electric bicycle. (Note: When the electric bicycle starts, it can be accelerated slowly when accelerating. At this time, the starting current will not be too large, and the noise of the driving wheel will be relatively small. At the same time, it will be beneficial to the battery life).
After-Sales Service
|
Warranty name |
Service term |
Warranty coverage (except human factors) |
|
Battery |
12 months |
The inspected capacity is less than 2/3 of the specified capacity or the inspected quality problem |
|
Motor |
12 months |
Performance failure |
|
Controller |
12 months |
|
|
Instrument |
12 months |
|
|
Charger |
180 days |
|
|
Frame |
12 months |
Desoldering, material fracture |
|
Front fork |
180 days |
Performance failure |
Not Covered By Warranty
- The warranty period has expired.
- Commercial rental is not warranted.
- Gifts are not covered by the warranty.
- Damage caused by unauthorized modification, disassembly and replacement of accessories.
- No warranty for parts damage caused by improper use or crash, injury, water inflow or overload use by users.
- Due to the change of the factory batch or upgraded parts of electric bicycles, there is no prior notice.
-
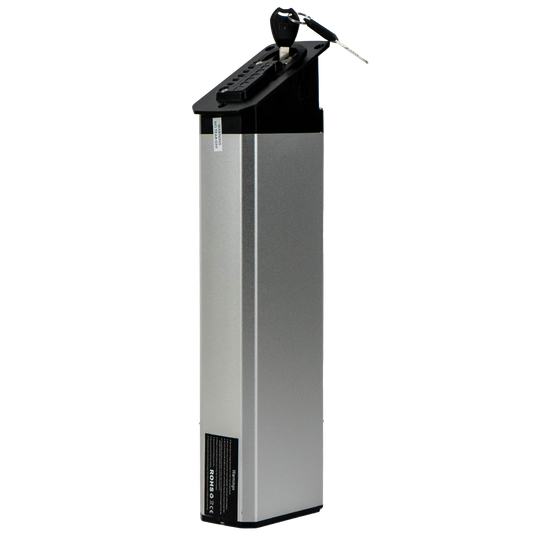
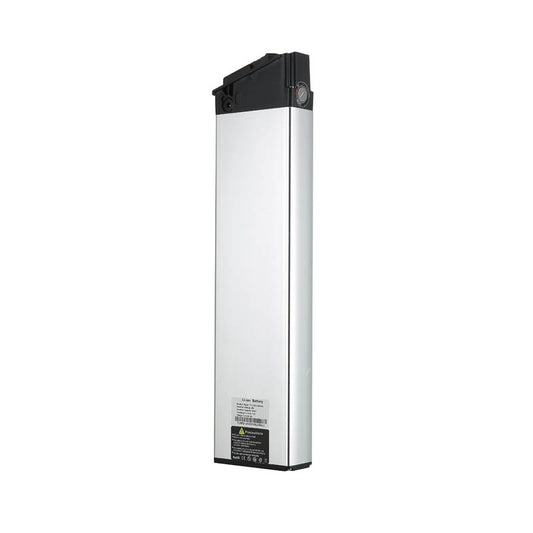
48V31.5Ah Original Battery for Burchda U8
Regular price €549,00 EURRegular priceUnit price per€589,00 EURSale price €549,00 EURSafe & Secure Payments


 Sale
Sale -
48V30Ah Original Battery for Burchda HC26
Regular price €499,00 EURRegular priceUnit price per€559,00 EURSale price €499,00 EURSafe & Secure Payments
Sale -
48V 17.5Ah Original Battery for Burchda RX90
Regular price €429,00 EURRegular priceUnit price per€499,00 EURSale price €429,00 EURSafe & Secure Payments
Sale -
Original Battery for Burchda RX80/RX50/AZ20
Regular price €419,00 EURRegular priceUnit price per€459,00 EURSale price €419,00 EURSafe & Secure Payments
Sale -
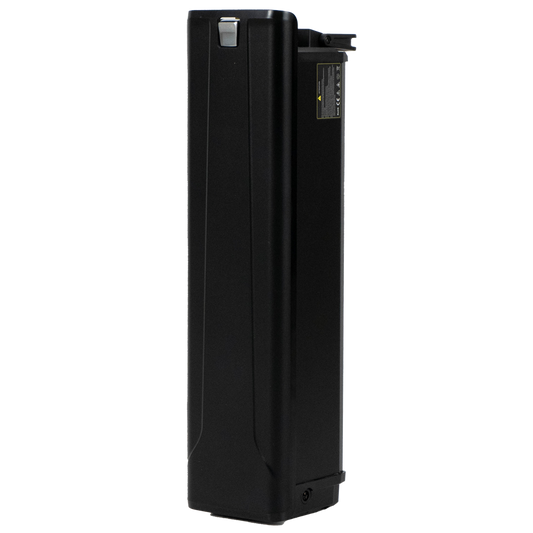
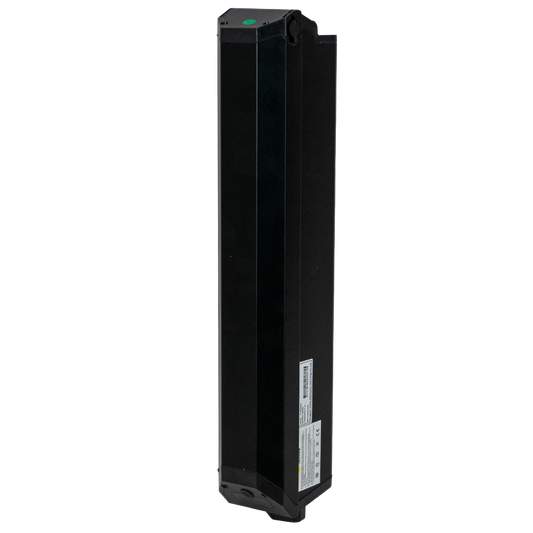
48V20Ah Original Battery for Burchda R5Pro
Regular price €409,00 EURRegular priceUnit price per€449,00 EURSale price €409,00 EURSafe & Secure Payments
Sale -
48V 20Ah Battery for Burchda AZ26
Regular price €399,00 EURRegular priceUnit price per€449,00 EURSale price €399,00 EURSafe & Secure Payments
Sale -
48V20Ah Original Battery for Burchda RX70/RX20
Regular price €399,00 EURRegular priceUnit price per€459,00 EURSale price €399,00 EURSafe & Secure Payments
Sale -
48V20Ah Original Battery for Burchda Itsands RX26
Regular price €389,00 EURRegular priceUnit price per -
48V17.5Ah/48V20Ah Battery For Burchda /Jinghma R7 Pro
Regular price From €389,00 EURRegular priceUnit price per -
Original Battery For Burchda R8/R8S/R8SPro/R8Pro
Regular price From €359,00 EURRegular priceUnit price per€379,00 EURSale price From €359,00 EURSafe & Secure Payments
Sale -
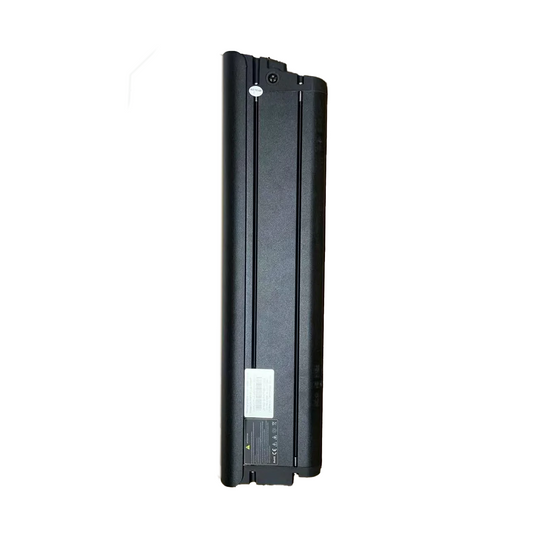
48V15Ah Original Battery for Burchda RX02/H1
Regular price €339,00 EURRegular priceUnit price per -
Original Battery for Burchda R3 PRO/R3
Regular price From €339,00 EURRegular priceUnit price per€329,00 EURSale price From €339,00 EURSafe & Secure Payments
-
48V15Ah Original Battery for Burchda RX60
Regular price €299,00 EURRegular priceUnit price per€329,00 EURSale price €299,00 EURSafe & Secure Payments
Sale -
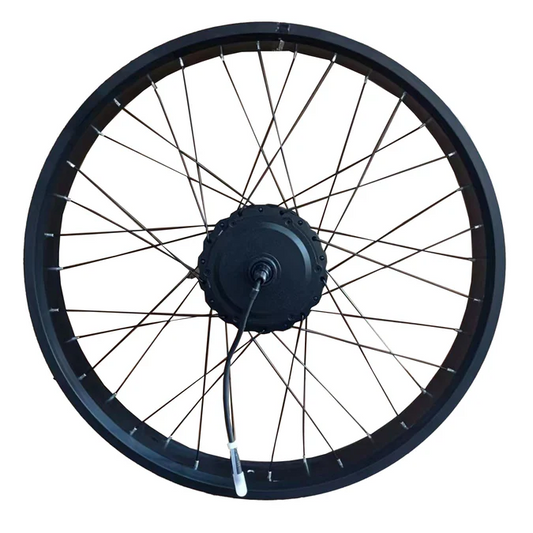
Original Rear Wheel Set (With Motor) For Burchda E-bike
Regular price From €249,00 EURRegular priceUnit price per -
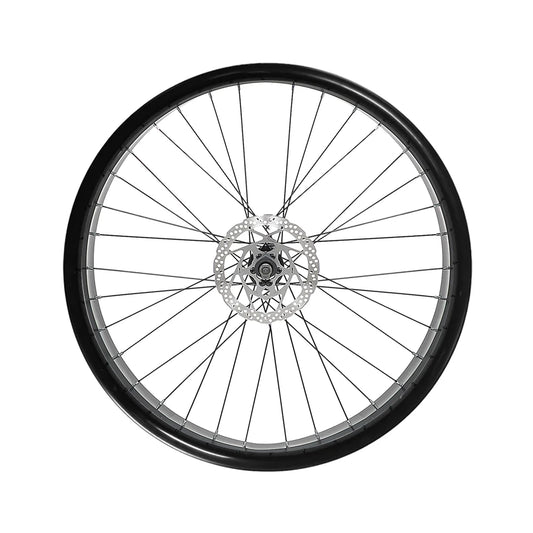
Original Front Wheel Set For Burchda E-bike
Regular price From €239,00 EURRegular priceUnit price per€229,00 EURSale price From €239,00 EURSafe & Secure Payments
-
Original Rear Wheel Set For Burchda E-bike
Regular price €229,00 EURRegular priceUnit price per -
Original Motor Core for Burchda E-bikes
Regular price From €199,00 EURRegular priceUnit price per€299,00 EURSale price From €199,00 EURSafe & Secure Payments
Sale -
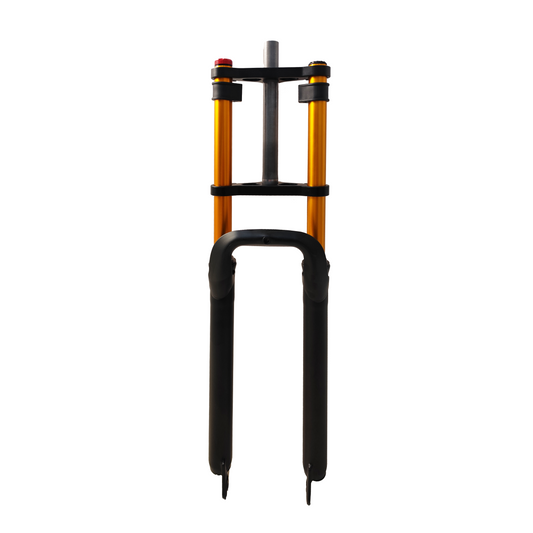
Front Fork Shock Absorber For Burchda E-bikes
Regular price From €159,00 EURRegular priceUnit price per€169,00 EURSale price From €159,00 EURSafe & Secure Payments
Sale -
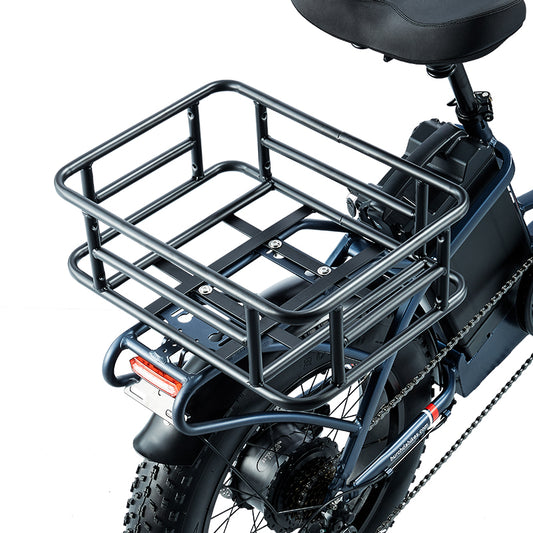
Rear Storage Basket for BURCHDA E-bikes
Regular price €129,00 EURRegular priceUnit price per€119,00 EURSale price €129,00 EURSafe & Secure Payments
-
Original Lower Fork for Burchda E-bikes
Regular price €119,00 EURRegular priceUnit price per€129,00 EURSale price €119,00 EURSafe & Secure Payments
Sale -
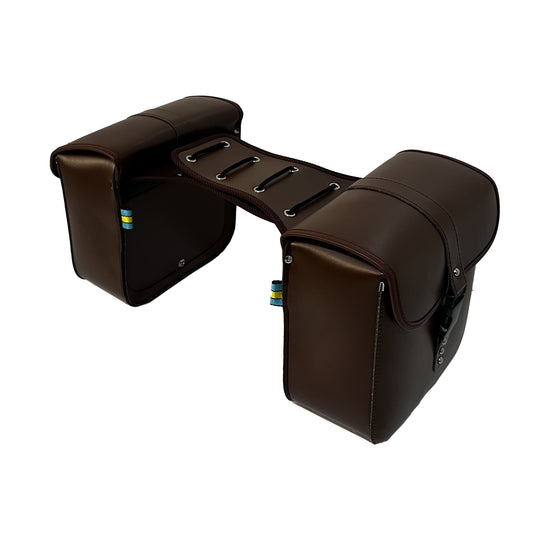
Burchda E-Bike Brown Leather Bag Durable Travel Bike Bag Mountain Bike Bag Luggage Bag
Regular price €119,00 EURRegular priceUnit price per€109,00 EURSale price €119,00 EURSafe & Secure Payments
Sold out -
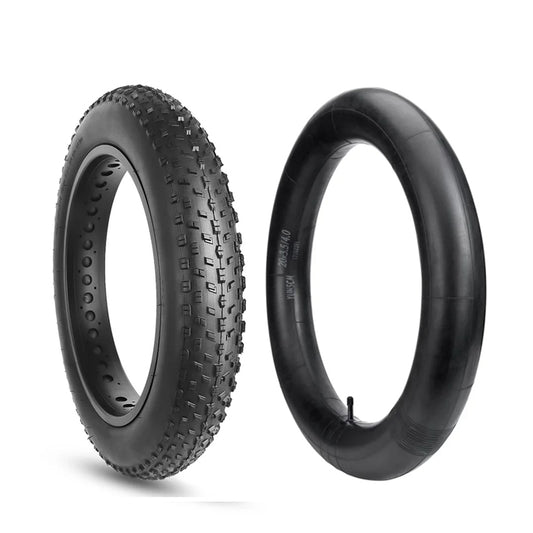
Burchda electric bike original inner and outer tires
Regular price €109,00 EURRegular priceUnit price per -
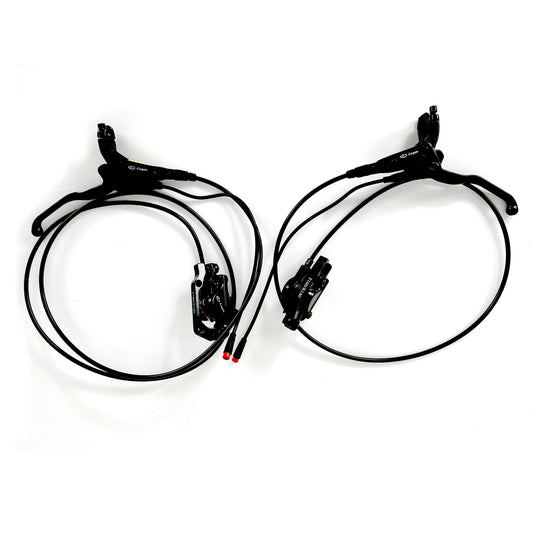
Original Hydraulic Brake / Mechanical Brake System For Burchda E-bikes
Regular price €109,00 EURRegular priceUnit price per -
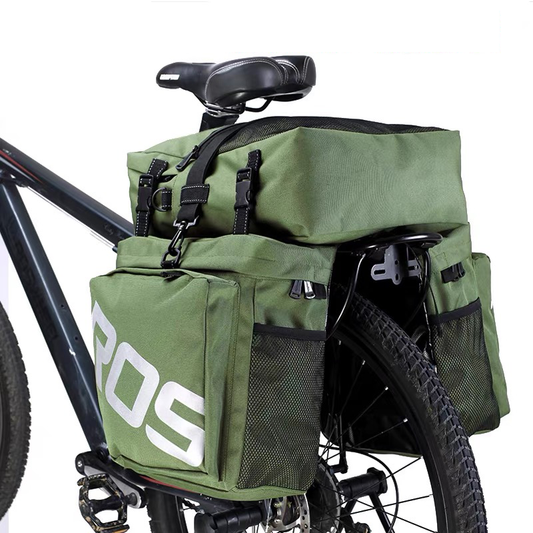
3 In 1 Trunk Bags Double Side for BURCHDA E-bike
Regular price €109,00 EURRegular priceUnit price per€119,00 EURSale price €109,00 EURSafe & Secure Payments
Sale -
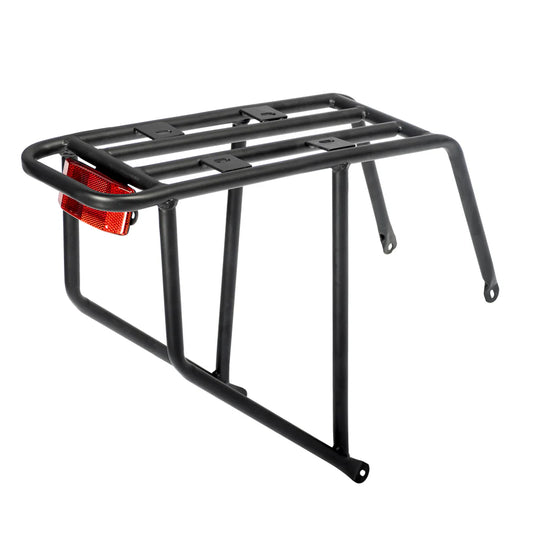
Original rear rack for Burchda E-bikes
Regular price €99,00 EURRegular priceUnit price per


-
 €200OFF
Burchda HC26 AWD
 2500W Brush-Less Motor
 48V30Ah UL certification
 100km Max Electric Range
 50km/h Max SpeedRegular price From €1.599,00 EURRegular priceUnit price per
€1.799,00 EURSale price From €1.599,00 EURSafe & Secure Payments
Sale -
 €370OFF
Burchda RX80 Dual Motor(Upgraded)
2000W Brush-Less Motor
48V 20Ah UL certification
65KM Max Electric Range
50KM/h Max SpeedRegular price From €1.329,00 EURRegular priceUnit price per€1.699,00 EURSale price From €1.329,00 EURSafe & Secure Payments
Sale -
 €400OFF
Burchda B27(2026 New Arrival)
1000W Brush-Less Motor
48V20Ah UL certification
80KM Max Electric Range
45KM/h Max SpeedRegular price From €1.499,00 EURRegular priceUnit price per€1.899,00 EURSale price From €1.499,00 EURSafe & Secure Payments
Sale -
 €230OFF
Burchda AZ26(2026 Upgraded)
1000W Brush-Less Motor
48V20Ah UL certification
65KM Max Electric Range
45KM/h Max SpeedRegular price From €1.069,00 EURRegular priceUnit price per€1.299,00 EURSale price From €1.069,00 EURSafe & Secure Payments
Sale -
 €250OFF
Burchda AZ20
1000W Brush-Less Motor
48V20Ah UL certification
65KM Max Electric Range
45KM/h Max SpeedRegular price From €1.199,00 EURRegular priceUnit price per€1.449,00 EURSale price From €1.199,00 EURSafe & Secure Payments
Sale -
 €250OFF
Burchda U8
1000W Brush-Less Motor
48V31.5Ah UL certification
100KM Max Electric Range
45KM/h Max SpeedRegular price From €1.299,00 EURRegular priceUnit price per€1.549,00 EURSale price From €1.299,00 EURSafe & Secure Payments
Sale -
 €400OFF
Burchda RX26(2026 New Arrival)
1000W Brush-Less Motor
48V20Ah UL certification
65KM Max Electric Range
45KM/h Max SpeedRegular price From €1.149,00 EURRegular priceUnit price per€1.549,00 EURSale price From €1.149,00 EURSafe & Secure Payments
Sale -
 €570OFF
Burchda X27(2026 New Arrival)
750W Brush-Less Motor
48V 17.5Ah UL certification
60KM Max Electric Range
40KM/h Max SpeedRegular price €1.029,00 EURRegular priceUnit price per€1.599,00 EURSale price €1.029,00 EURSafe & Secure Payments
Sale -
 €250OFF
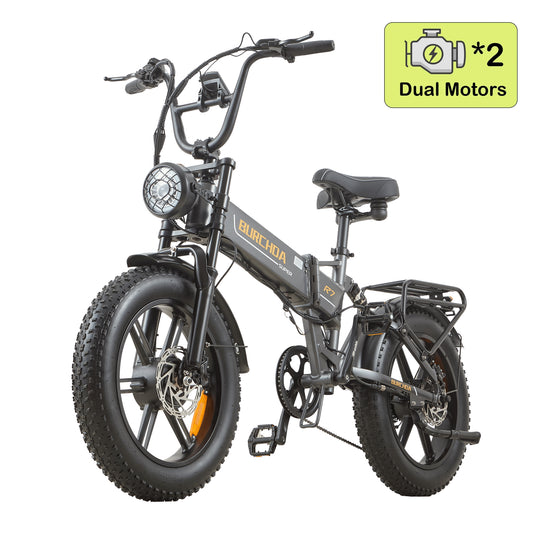
Burchda R7 Pro Dual Motor
2000W Brush-Less Motor
48V20Ah UL certification
65KM Max Electric Range
45KM/h Max SpeedRegular price From €1.149,00 EURRegular priceUnit price per€1.399,00 EURSale price From €1.149,00 EURSafe & Secure Payments
Sale -
 €240OFF
Burchda RX02
1000W Brush-Less Motor
48V15Ah UL certification
60KM Max Electric Range
45KM/h Max SpeedRegular price From €849,00 EURRegular priceUnit price per€1.089,00 EURSale price From €849,00 EURSafe & Secure Payments
Sale -
 €150OFF
Burchda R3 (2026 Upgraded)
800W Brush-Less Motor
12.8Ah UL certification
45KM Max Electric Range
40KM/h Max SpeedRegular price From €849,00 EURRegular priceUnit price per€999,00 EURSale price From €849,00 EURSafe & Secure Payments
Sale -
 €260OFF
Burchda RX20(2026 Upgraded)
1000W Brush-Less Motor
48V20Ah UL certification
65KM Max Electric Range
45KM/h Max SpeedRegular price €1.029,00 EURRegular priceUnit price per€1.289,00 EURSale price €1.029,00 EURSafe & Secure Payments
Sale -
 €370OFF
Burchda RX80(Upgraded)
1500W Brush-Less Motor
48V20Ah UL certification
65KM Max Electric Range
45KM/h Max SpeedRegular price From €1.329,00 EURRegular priceUnit price per€1.699,00 EURSale price From €1.329,00 EURSafe & Secure Payments
Sale -
 €180OFF
Burchda R7 Pro (2026 Upgraded)
1000W Brush-Less Motor
48V120Ah UL certification
55KM Max Electric Range
45KM/h Max SpeedRegular price From €1.169,00 EURRegular priceUnit price per€1.349,00 EURSale price From €1.169,00 EURSafe & Secure Payments
Sale -
 Sold out
Burchda RX50
1000W Brush-Less Motor
48V17.5Ah UL certification
60KM Max Electric Range
45km/h Max SpeedRegular price From €1.099,00 EURRegular priceUnit price per


